Happy Girl Nachos

I have fluctuated between vegetarian and “vegan-ish” diets for much of my adult life.  I feel best when I eat a mostly vegan diet, but I tend to get to a certain time frame and then I cave because there’s some food that I just can’t quite replicate and I really miss it.  Often, that food is nachos.  I will fully admit a serious need for nachos in my life.  I heart them.  Really.

About a month ago, I was feeling the need for a plate of nice warm chips with their oozy, cheesy goodness and some of my favorite toppings, but with a true and concerted effort to stick to my vegan eating this time, I figured I’d just have to deal with it.  I was sitting sadly outside of my son’s beat band class when I made a desperate attempt to find some online recipe on my phone that I could at least attempt.  I ran across this blog where some crazy girl wrote that I could have my vegan cheesy sauce with a simple scoop of red pepper hummus, some unsweetened almond milk, and a pinch of Daiya cheese?  Um, no.  I was thinking she’d lost it, but I was willing to try.

Now I love her.  Truly brilliant, I say!!  And scrumptious.  It even got a semi-thumbs up from the hubs who is from Wisconsin, so you don’t mess with his cheese.  This is seriously good.  And seriously simple.  I now enjoy my nachos anytime I like…which actually I should be mad at Happynhealthy for because it means I either better get off my ass and re-kickstart my running program, or resign myself to being fat and happy on my couch eating nachos.

Here’s how she says to mix it up, but honestly I don’t measure anything anymore.  It always turns out good~

Vegan Cheese Sauce – 70 calories per serving (approx 1/4 C)

  • 2 T Roasted red pepper humus
  • 1 T Unsweetened almond milk
  • 1 T Daiya dairy free cheese
  • Mix and heat in the microwave for 45 secs

nachos

Red Lentil Dal

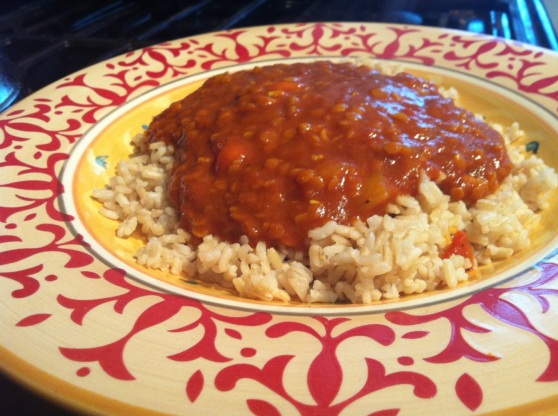
I have a significant other who loves Indian food.  Loves!  I don’t love it.  Every time we have an opportunity to have a date night, his first suggestion is any Indian restaurant in town.  I almost always decline.  I do start to feel guilty about it, though, and when I ran across this Red Lentil Dal in The Happy Herbivore, I thought it would be a nice gesture.  Would you believe that I love it, too!?

Red Lentil Dal

from The Happy Herbivore by Lindsay Nixon

1 small onion, diced

2 garlic cloves, minced

1 tsp turmeric

1 tsp ground cumin

1 tsp paprika

1 T. ground ginger

1/2 c. dried red lentils

2 c. vegetable broth

1 chopped tomato, with juices

3 oz. tomato paste

1 T. ground coriander

2 tsp garam masala

salt, to taste

pepper, to taste

cayenne, to taste

Line a medium pot with 1/2 c. water and cook onions and garlic until transluscent.

Add turmeric, cumin ,paprika, and ginger and cook for another 2 minutes, adding water if necessary to prevent sticking or burning.

Add lentils, broth, tomato, tomato paste, and coriander, stirring to combine.

Bring to a buil, then reduce heat to low and simmer for 15 minutes or until lentils are cooked and orange-ish.

Add garam masala, stirring to combine, and let rest 5 minutes.  Add salt, pepper and cayenne.

*Nutritional Information:  Calories 134, Total Fat 0.7, Cholesterol 0, Total Carbs 25.5, Dietary Fiber 9,3, Protein 7.0g.

We ladled ours over a bed of cooked brown rice and it was truly delicious~

red lentil dal

Vegan stuffing and “sausage”

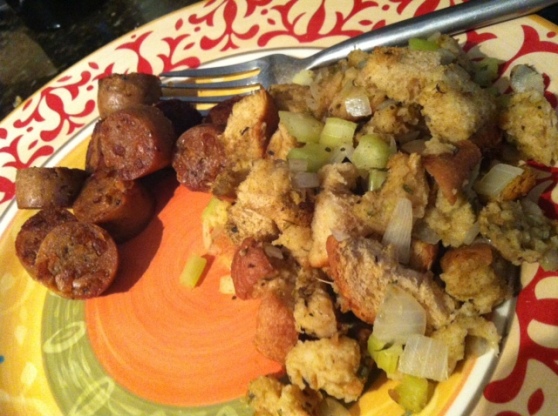
If you haven’t tried Field Roast sausages yet, you are missing out.  Our favorite so far is the Smoked Apple Sage which is just plain amazing.  Tonight I took it out of the casing, sliced it in to rounds and sauteed them with a little bit of olive oil until they were browned and getting a little crisp.  Mouthwatering delicious and between these and some of the traditional sausages I used to eat, there is no contest.  I’d pick this anyday!

I’m also love, love, loving my Happy Herbivore cookbook lately and Nixon’s Traditional Stuffing recipe was the perfect complement to the Field Roast Smoked Apple Sage sausage.

Traditional Stuffing

6 c. cubed whole wheat bread ( I left mine out overnight)

1 1/2 tsp dried oregano

1 1/2 tsp dried thyme

1 1/2 tsp dried parsley

1 1/2 tsp dried basil

1 1/2 tsp powdered sage

1 large onion, chopped

4 celery sticks, chopped

1 c. No Chicken Broth

____________________________

Preheat oven to 350* and lightly spray a 9×13 baking pan.  Set aside.

Transfer bread cubes to a plastic bag.  Spray once or twice with cooking spray, add herbs and toss for a minute.  ( I actually did this in a large mixing bowl so as not to use a plastic bag, but whatever works).

Open bag and re-spray once or twice, then seal it and shake gently until cubes are evenly coated.  Set aside.  (Again, I did this in a bowl, so I put part of the bread crumbs in, sprayed, sprinkled the herbs, then added more bread, sprayed, sprinkled, etc.)

Cook celery and onion in 1/2 c. of water (I used the No Chicken Broth for this step), over medium heat until celery is soft, onion is transluscent and most of the water (broth) has evaporated; about 5 minutes.

Transfer to a large bowl and combine with bread cubes.

Stir to combine, then transfer to prepared pan.

Drizzle with 1/4 c. broth or less.  (I used 1/2 c. because 1/4 didn’t seem like quite enough).

Bake for 30 minutes, checking every 10 minutes and adding more No Chicken Broth as needed to prevent stuffing from drying out.

________________________________________________

Now, you may think this sounds like an Autumnal sort of dish, but I can assure you….it’s delish any time of year.

Stuffing

Nutritional Info (Stuffing Only):  Recipe serves 8.  Calories 115, Cal from Fat 13, Total Fat 1.4g, Cholesterol 0, Total Carb 20, Dietary Fiber 3.3, Sugars 3.4, Protein 6.7

Blueberry Oatmeal Muffins

I have a girl in my life who loves scones or any baked goods she can get her little 3-year old hands on.  I will buy her one periodically on our way through Starbucks or if she’s good at the grocery store, but honestly, I don’t feel great about either option, knowing they are loaded with fat and sugar and who knows what else.

I love the Happy Herbivore and recently got Nixon’s cookbook.  She’s got a great recipe for Blueberry Oatmeal Muffins that are a hit with both Sophie and myself, and they are the perfect on-the-go breakfast as I’m off to class.  Oh, and no one would believe it’s only 123 calories!

Blueberry Oatmeal Muffins

1 1/2 c. whole wheat pastry flour

1/2 c. rolled oats

2 tsp baking powder

1 tsp baking soda

1/4 tsp salt

1 tsp ground cinnamon

1/2 tsp ground ginger, or to taste  (I happened to have a gingerroot in my hand so I used fresh and it was perfect.  Probaby about a tsp)

1 c. unsweetened applesauce (The only applesauce on hand was organic cinnamon.  It worked just fine)

1/2 c. brown sugar

1/4 c. pure maple syrup

3/4 c. frozen wild blueberries


Preheat oven to 350*.  Grease or spray muffin tin or paper liners, if using.

In a large bowl, whisk flour, oats, baking powder, baking soda, salt, and spices together until well-blended.

Add applesauce, sugar, and maple syrup and stir until mostly combined.

Add blueberries, stirring until just combined.

Spoon into muffin cups, 3/4 full.

Sprinkle additional oats or brown sugar on top if desired.  (I did a tiny amt of both)

Bake for 18-25 min, until a toothpick inserted in the center comes out clean.  (20  min was perfect for my oven)

Transfer to a wire rack for cooling.

Blueberry Muffin


Nutritional Information:  Cal 123, Calories from fat 5, Total Fat 0.5, Cholesterol 0, Total Carbs 27, Dietary Fiber 2.4, Sugars 12, Proteins 2.1.

Vegan Minestrone & Crostini with Roasted Garlic White Bean Dip

The title sounds all crazy and challenging, but really…it was just dinner.  A dinner that involved a little chopping and a little blending, but no big deal.  In the end we had a beautiful, healthy, filling, home cooked vegan dinner and that feels good.

The minestrone is based on a recipe I found here.   I changed it up a little, but not much.  Here’s the scoop on the soup:

Minestrone Soup Serves 4

Olive Oil

1 yellow onion, diced

3 cloves of garlic, minced

1 can stewed tomatoes  (15 oz)

6 baby carrots, diced

6 c. vegetable stock

2 bay leaves

1/2 tsp celery salt

1 c. small shell macaroni

2 c. kale, chopped

Salt to taste

1/2 c. frozen peas

1 can garbanzo beans, drained and rinsed

2 T. fresh rosemary, chopped

1/4 c. red wine

1 T. balsamic vinegar

Black Pepper

Add a few tablespoons of olive oil in the bottom of a soup pot that has a lid.  Heat oil and add onions.  Cook over medium heat, stirring occasionally, for 10 minutes.  In the last minute of cooking, add the garlic.

Add the tomatoes to the onions and garlic and simmer for another 4-5 minutes.  Add the carrot and the broth and bring to a boil.  Add the bay leaves, and celery salt cook until the carrots begin to soften.  Add the wine and the kale.  Then add pasta and garbanzo beans and stir often.

Add salt and fresh ground black pepper to taste.  Simmer, uncovered, until the pasta is cooked.  Add the peas and the balsamic vinegar.  Stirl.  Turn off heat, add fresh herbs.  Stir again.  Ladle in to bowls.  If you aren’t concerned about the vegan status of the dish, some fresh parmesan grated on top is delicious, too, but completely unnecessary.

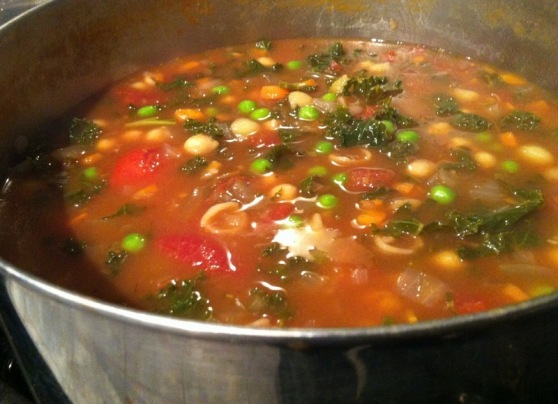
Here’s mine, simmering away and smelling scrumptious…

Soup

In the meantime, I was also working on the toasted bread with white bean spread.  Grab a baguette from a local bakery, and slice it up.  Put it on a baking sheet, rub or brush a little olive oil on to it, and pop it in the oven at around 425 until it begins to get lightly browned on the edges.  Take it out and top it with some dollops of this yumminess that I found here.  I love her stuff, by the way….

Roasted Garlic White Bean Dip (from Kitchy Kitchen)

2 cups cannelini beans (canned or cooked)
1/2 cup reserved liquid (from cooking or the can)
1 teaspoon rosemary, chopped
1 head, roasted garlic
1 tablespoon balsamic vinegar
To roast garlic, cut the top off of the head of garlic, drizzle with olive oil and sprinkle with salt.  Wrap in aluminum foil and roast in a 425 F oven for 45 minutes, or until tender and golden brown.
In a food processor or blender (I used my regular old blender), combine the beans, rosemary, roasted garlic, and balsamic until pureed.  To make the texture looser, add a little liquid a little at a time until you’ve reached your desired consistency. Salt and pepper to taste.

beandip

And so, dinner was complete.  Packed with the superfoods of kale and garlic, I’m sure this dinner could cure anything.  Maybe.  Since I have a decent cold right now, I’ll keep ya posted on that….

Roasted Vegetable Pasta

Used the recipe exactly as found here.  I really like Claire Thomas.  I think her food has a simplicity that makes it doable, and yet everything is balanced and lovely.  D.Jones made fun of me when I told him we were having pasta with squash and potatoes.  I believe he said “Nice!  How about some starch with your starch?”  The truth is, we both ended up loving it.  The final splash of balsamic brings out all of the flavors and the basil…oh yum, the basil.  I love basil and this gave me an excuse to use an entire bunch of it.  Yum~

Roasted Vegetable Pasta
For 6
1 cup roasted butternut squash (1 inch chop)
1 cup roasted potatoes (yukon gold, 1 in ch chop)
1 cup roasted red onion (1 red onion, sliced into 1/2 inch thick circles)
2 tablespoons olive oil, plus more for drizzling
1 cup cherry tomatoes, halved
1 garlic clove, minced
1/2 cup basil, chiffonade
2 tablespoons balsamic vinegar
8 oz dry pasta
This is meant to be a left overs meal, but if you’re roasting your veg from scratch preheat your oven to 425 F.  Start with a cup and a half of each vegetables and rub with a heavy drizzle of olive oil.  Sprinkle with salt and pepper and spread out over a baking sheet (you may need two baking sheets to ensure that the the vegetables aren’t touching).  Roast for 25-45 minutes, depending on the vegetable (less time for red onion, more time for potatoes).  Halfway through roasting, flip the vegetables to make sure both sides are cooking evenly.  Once the vegetables are crisp at the edges, remove from the oven.
Meanwhile, cook your pasta in salted boiling water per manufacturer’s instructions.  While the pasta cooks, heat up a large sauté pan over medium heat and add the olive oil and then cherry tomatoes.  Let the tomatoes cook for about one minute, and then add the garlic.  Add the roasted vegetables, stirring to combine.  Add the basil and stir.   When the pasta is done, add it to the  sauté pan straight from the pot with a slotted spoon.  The residual water on the pasta will create a sauce.  Stir and finish with balsamic vinegar and salt and pepper to taste.


Hearty Curried Farro Salad

I love a good, nutty, wonderful salad that I can tote along to class with me on busy days.  I just made this for the first time today and it quickly moved to the top of my grain salad faves.  I found it here and changed very little, but I’ll post my version none the lexs.

Hearty Curried Farro Salad

1 cup farro (I measured 1 cup of dry, so I probably made more than intended by the recipe)
1/2 red onion, finely chopped
1 fennel bulb, sliced
2 tablespoons olive oil
1/2 cup golden raisins
1/2 cup pecans halves
Salt and Pepper
1 large handful arugula
Curry Vinaigrette:
1 tablespoon balsamic
2 tablespoons olive oil
1 tablespoon chutney
1/2 tsp hot curry powered
salt and pepper
Preheat oven to 400F. Thinly slice the fennel and place on a baking sheet.
Drizzle with olive oil, sprinkle with salt, and roast for 20 minutes at 400 F,
or until golden brown and crisp at the edges. Cook farro per manufacturers
directions. Combine farro, fennel, red onion, raisins, pecans, and arugula.
*I ended up making slightly more dressing than the recipe suggests, probably because of my use of so much farro.
This salad is lightly dressed so the peppery arugula comes through, the nutty pecans and raisins are perfect, and the hint of curry spice to go with the chutney in the vinaigrette is just excellent. Even with so much flavor, my daring 2 year old dug in and declared “In my tummy this makes me giggle!”  I think that means she loved it as much as I.   This will be on my regular lunch rotation, no doubt!

White Chocolate Chip Cookies

Easy and seriously, seriously good.


White Chocolate Chip Cookies

straight off the Nestle bag

1 2/3 c. all purpose flour

3/4 tsp. baking powder

1/2 tsp. baking soda

1/2 tsp salt (I probably used more like 1 tsp)

3/4 c. (1 1/2 sticks) butter, softened

3/4 c. packed brown sugar

1/3 c. granulated sugar

1 tsp. vanilla extract

1 large egg

2 c. Nestle premier white morsels

Preheat oven to 375*

Combine flour, baking powder, baking soda and salt in small bowl.  Beat butter, brown sugar, granulated sugar, vanilla and egg in mixing bowl until creamy.  Gradually beat in flour mixture.  Stir in morsels.  Drop by rounded tablespoon on to ungreased cookie sheet.  Bake for around 10 min or until tops just begin to look toasted.


Egg and Cheese Bake

My mom makes it for Christmas morning every year, Doug and I make it for Sunday brunch, a weeknight dinner, or any other time it occurs to us.  You can change it up every time and add or remove ingredients based on your own taste.  Here is one of my favorite combinations.

Egg & Cheese Bake

10 eggs

1/2 loaf of white or white wheat bread or the equivalent in baguette

2 c. shredded cheese (1/2 cheddar, 1/2 pepperjack is my fave)

2 c. 2% milk

1 1/2 tsp. Herbs de Provence

1 finely diced shallot

pinch of red pepper flakes

S&P

butter

___________________________________

Butter a casserole dish.

Take bread slices and slice off crusts.  This doesn’t have to be perfect.   Then cut into cubes.  You can also employ kids for this step.  Cooper and Soph never mind sitting at the table and tearing up bread for me.  Toss the bread in to your buttered casserole dish.

In medium mixing bowl, whisk eggs thoroughly.  Add the milk, shallot and Herbs de Provence, red pepper flakes and S&P.  Whisk them together.  Add the cheese.  Pour this mixture on top of your bread, cover with foil and put it in the fridge for a few hours.  Overnight works perfectly, or make it in the morning to have for brinner.

Remove from fridge and let it sit on the counter for about 20 min.

Bake at 350* uncovered for about 45 min or until center is cooked through completely.

Let it sit again for about 5 or 10 min and then cut in to squares and serve.  Yum.  Plus, your house will smell fabulous!

Doug likes his served with a 1/2 of a sliced avocado on the side which is a lovely addition~

Tex-Mex Shrimp

I rarely cook with shrimp.  Like, literally hardly ever.  I don’t know what came over me, but I blame it on Kate posting this last week.  Anyway, I made a little different version tonight and I must say, they are delish and versatile, just like Kate’s.

Tex-Mex Shrimp

Borrowed from here….

Cooking spray

1 1/2 cups chopped white onion

1 teaspoon ground cumin

1 teaspoon chili powder

1 1/2 pounds medium shrimp, peeled and deveined

3 garlic cloves, minced

2 tablespoons butter

1/2 teaspoon salt

1/8 teaspoon hot pepper sauce  of your choice

1/4 cup fresh lime juice

1/4 cup finely chopped green onions

Heat a large nonstick skillet coated with cooking spray over medium-high heat. Add onion; sauté 3 minutes. Add cumin, chili powder, shrimp, and garlic; sauté 4 minutes. Remove from heat, and add butter, salt, and hot sauce. Stir until the butter melts. Stir in juice and green onions.

_________________________________-

I can imagine these little guys would be delicious over rice, or on top of a taco salad, or just about any way you serve them.  I made them in to tacos for D.Jones by putting a dollop of homemade guac on a slightly warmed corn tortilla (doubled up, actually so they don’t tear and fall apart), and then layered some shrimp on top of the guac, topped that with a sprinkle of crumbled cotija cheese, some fresh cilantro and sliced green onions.

For myself, I crisped the corn tortilla in the oven and made it tostada-style, all nice and crunchy, then a layer of guac and the same toppings as above.  D.Jones and I taste-tested and it’s impossible to say which was better..they were both really good.

Taco Style

Or tostada style